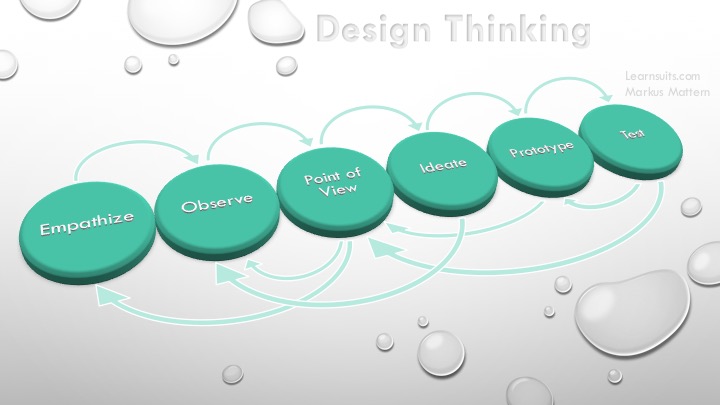
An Empathy Map is a nice way to look at our problem or question from the perspective of the customer or the user. Ideal for our Design Thinking work. So let’s see what this is about.
When do I use the empathy map?
Our design thinking team is currently in the problem definition phase and we would like to build a better understanding of it. What does the user think when he uses the product or wants to buy it? The empathy map provides information about what thoughts or feelings this one feels and how we use ideal white after creating the personas. Of course, then a map is created for each Persona and hung in the workshop room.

How does it work
We start with a big piece of empty paper. It’s best to hang it on a wall, a flipchart or a whiteboard. The following process now goes through 5 steps:
- Create or draw the map
- Problem definition or question
- Determine and label fields
- Empathy – empathizing with the user and the Person
- Review and completion
Let’s get started:
Step 1 – Create or draw a map
Our map consists of a circle which represents the user or the person. We draw this in the middle of the poster. This can happen arbitrarily creative or detailed. Depending on how exactly we want to define or draw our user. You can also think of a little story in the form of a persona but it should not take too much time.
Step 2 – Problem definition or question
Now it’s time to ask the right question. In which situation do we want to put ourselves in the picture? What should happen to that. This can be very different. From the question of what a customer feels when he wants to use our product, to the question: Why should a customer buy our product.
Step 3 – Determine and label fields
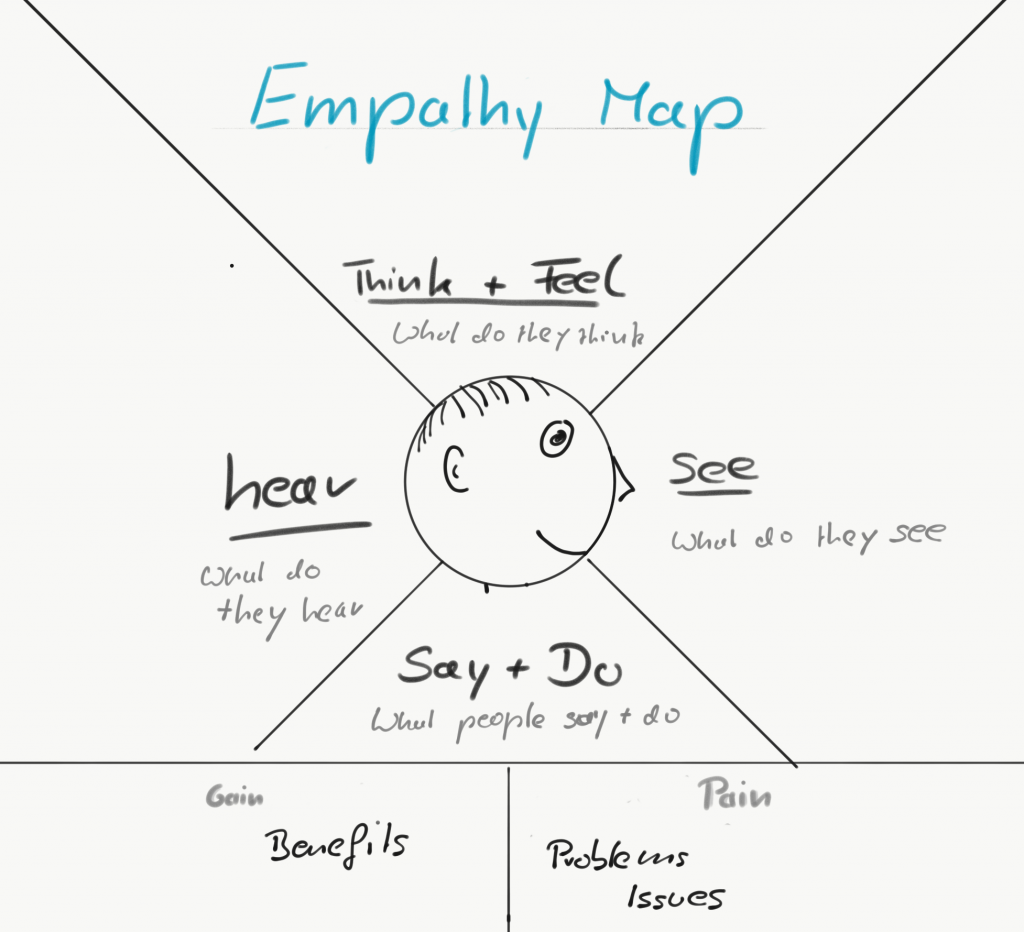
Our map needs to be completed. So far we have only drawn our user in the middle. As a smiley or as a head. Now we divide the surrounding field on paper into 4 fields. As can be seen in the picture. These fields now receive a label. Above: up in the head is the brain so it’s about thinking and feeling. Below is the mouth and the rest of the body, so this is about speaking and doing. So what is said and what should be done with the hands. And then depending on how you drew your head. On the left side is the ear to hear and on the right side the eye to see. What does the user hear during use and what can he see? So our caption is complete. Around our heads, we have divided the sheet of paper into four sections and labeled them Thinking, Doing, Hearing and Seeing.
Also very common is a method of empathy map in addition to the four named fields still two more fields are inserted. Pain and gain titled. This is about the pros and cons that the user will feel in the current situation. If our product solves a problem which it wants to solve or where the participant will have problems and see problems.
Step 4 – empathy – empathize with the user and the person
Now comes the actual step in the method. We give empathy free rein. Now the user will be transferred. Our empathy map is filled. The team is now thinking about how the user feels, what he thinks, what he can see and hear while using the product. The better the group succeeds, the better the result will be in the end. It is best to start in a situation with the first field. “If our user uses the product, what could his thoughts be? What does he feel? This is then recorded as briefly as possible and written on the poster in the appropriate field. So gradually our poster fills with many interesting points and aspects around our users. This step should be limited in time so that it is not unnecessarily lengthened. The time limit also increases the chance that the Design Thinking Team comes in the right flow.
Step 5 – Review and Completion
After a while, it’s time for the Design Thinking Team to review their work. We have a large map with many comments and notes in the 4 areas. Ideally, there should now be something in every area of the poster. If there is still an important idea or a thought missing, this can of course be quickly supplemented by the team. A full empathy map should provide a pretty good picture of what our user thinks and feels about our users. This can now be used in the room as a thinking support for the following steps in the innovation process.
Advantages and disadvantages
A great advantage of the method is that you absolutely put yourself in the role of the user and understand the activity as this. The better the team gets the better the results will look in the end. If the team has some experience with the method, that should not be a problem. The better the flow, the faster the results are visible.
The disadvantage, however, is that only in rare cases, the team can put absolutely in the role of the user. Every opinion is always shaped by the user. A certain amount of personal opinion always gets into the map. It is important that you keep this point in mind and subject the map to a corresponding consideration.
Finally, I would like to say that the empathy map is a nice and fast way to put yourself and the team in the role of the customer. Thoughts, sensations, seeing and hearing. The effort is very manageable and time it should not take more than 30 minutes. These can be quickly incorporated into any session without any problems and contribute a good deal to the success of the session.
And of course, as always, try and gain experience …


One thought